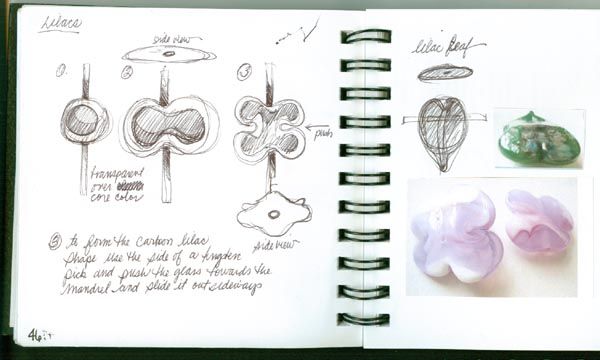
Recently, I made some lilac inspired beads and fashioned them into a necklace.

I am celebrating my first day of teaching bead making today and I thought I would share my sketches and notes as a free tutorial to try and get my mojo working for tonight. I am very nervous to be actually working with a group of beginning bead makers. The regular teacher has family in town and I was asked to cover her class. I am as nervous as a cat.

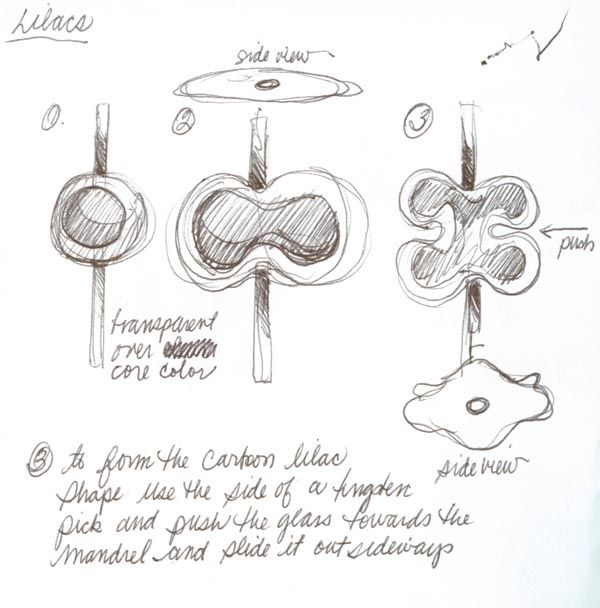
Above are the sketched notes I made for myself.
Start with a thin lentil bead. I use ice tongs to form my lentils but any sort of lentil press will work. After you have your lentil you heat one side's edge till glowing - it's all about temperature - when it is just about to start to slump take your rake, tungsten pick or even a mandrel and push the side in perpendicular to the mandrel. It sort of folds in like a fortune cookie, pushing the glass towards the mandrel in a soft bump. Pull the tool straight out between the fold, don't try to take it out the same way you pushed it in.

repeat on the other edge of the lentil. flame polish and anneal.


1 comment:
Wonderful tutorial! Awesome beads!
Post a Comment